Ingesting data for publication
Learning Outcomes
By the end of this practical session, you will be able to:
- trigger the wis2box workflow by uploading data to MinIO using the MinIO web interface, SFTP, or a Python script.
- access the Grafana dashboard to monitor the status of data ingestion and view logs of your wis2box instance.
- view WIS2 data notifications published by your wis2box using MQTT Explorer.
Introduction
In WIS2, data is shared in real-time using WIS2 data notifications that contain a "canonical" link from which the data can be downloaded.
To trigger the data workflow in a WIS2 Node using the wis2box software, data must be uploaded to the wis2box-incoming bucket in MinIO, which initiates the wis2box data workflow to process and publish the data.
To monitor the status of the wis2box data workflow you can use the Grafana dashboard and MQTT Explorer. The Grafana dashboard uses data from Prometheus and Loki to display the status of your wis2box, while MQTT Explorer allows you to see the WIS2 data notifications published by your wis2box instance.
In this section, we will focus on how to upload data to your wis2box instance and verify successful ingestion and publication. Data transformation will be covered later in the Data Conversion Tools practical session.
To manually test the data ingestion process, we will use the MinIO web interface, which allows you to download and upload data to MinIO using a web browser.
In a production environment, data would typically be ingested using automated processes, such as scripts or applications that forward data to MinIO over S3 or SFTP.
Preparation
This section assumes you have successfully completed the Configuring Datasets in wis2box practical session. If you followed the instructions in that session, you should have one dataset using the Universal plugin, and another that uses the FM-12 data converted to BUFR plugin.
Ensure you can log in to your student VM using your SSH client (e.g., PuTTY).
Ensure wis2box is up and running:
cd ~/wis2box/
python3 wis2box-ctl.py start
python3 wis2box-ctl.py status
Ensure MQTT Explorer is running and connected to your instance using the public credentials everyone/everyone with a subscription to the topic origin/a/wis2/#.
The Grafana Dashboard
Open the Grafana dashboard available at http://YOUR-HOST:3000 and you will see the wis2box data publication dashboard:
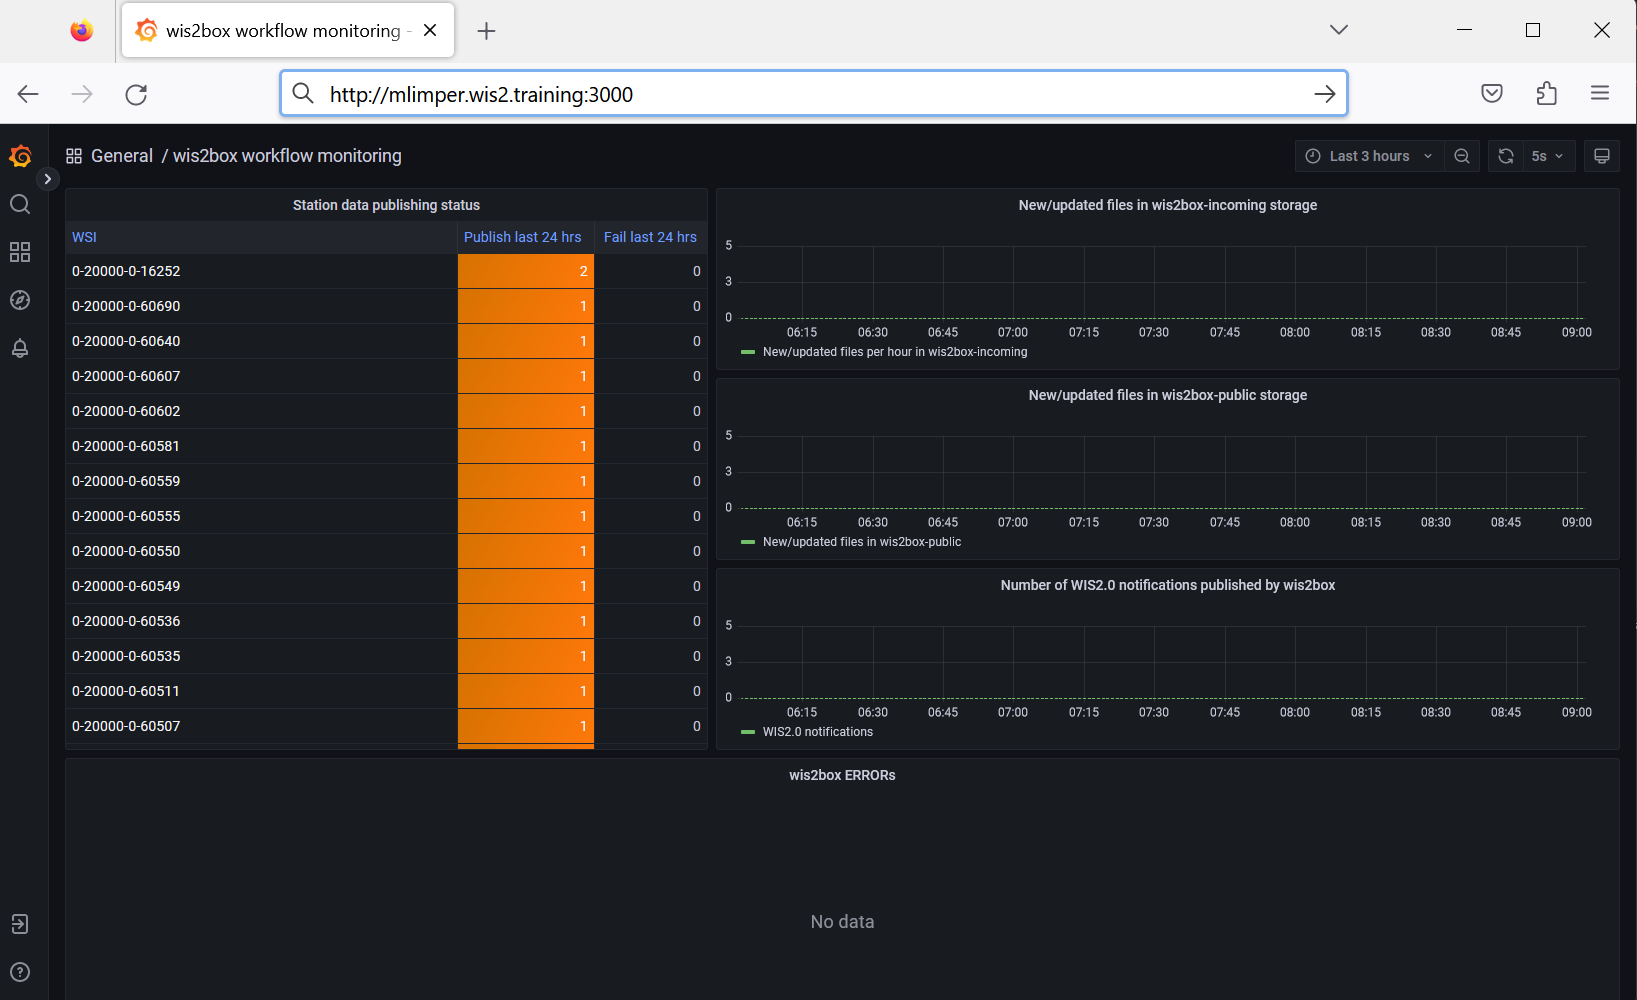
Keep the Grafana dashboard open in your browser as we will use it later to monitor the status of data ingestion.
Using the MinIO Web Interface
Open the MinIO web interface available at http://YOUR-HOST:9001 and you will see the login screen:
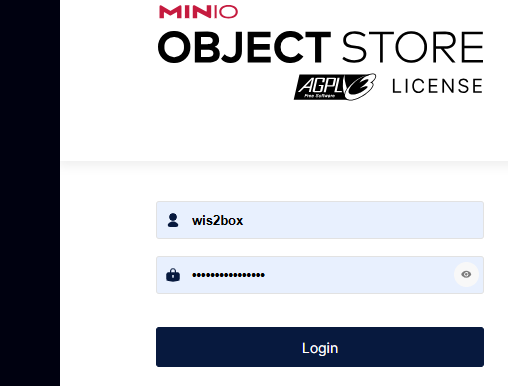
To login you need to use the credentials defined by WIS2BOX_STORAGE_USERNAME and WIS2BOX_STORAGE_PASSWORD in the wis2box.env file. You can check the values of these variables by running the following commands on your student VM:
cat wis2box.env | grep WIS2BOX_STORAGE_USERNAME
cat wis2box.env | grep WIS2BOX_STORAGE_PASSWORD
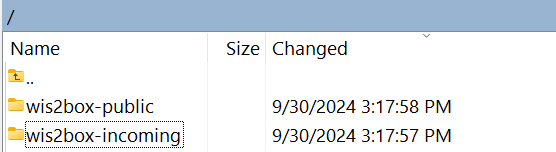
After login you are in the Object Browser view of MinIO. Here you can see the buckets used by wis2box:
- wis2box-incoming: This is the bucket where you upload data to trigger the wis2box workflow.
- wis2box-public: This is the bucket where wis2box publishes data that has been successfully ingested and processed.
Click on the bucket wis2box-incoming. Try the option to define a new path in this bucket by clicking Create new path:
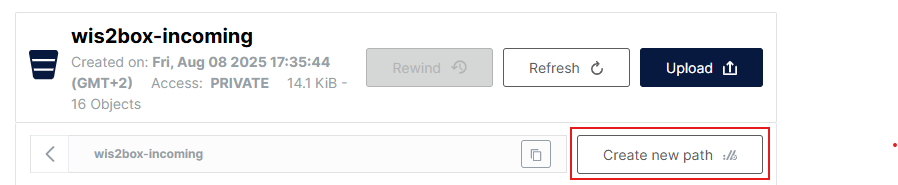
Enter the new Folder Path = *new-directory" and upload this example file mydata.nc (right-click and select "save as" to download the file). You can use the "Upload" button in MinIO to upload the file into the new directory:

Question
After uploading the file, how do you see if data workflow in wis2box was triggered successfully?
Click to Reveal Answer
You can check the Grafana dashboard to see if the data was successfully ingested and published.
Look the bottom panel of the Grafana dashboard and you will see a Path validation error indicating that the path does not match any configured dataset:
ERROR - Path validation error: Could not match http://minio:9000/wis2box-incoming/new-directory/mydata.nc to dataset, path should include one of the following: ['urn:wmo:md:int-wmo-example:synop-dataset-wis2-training', 'urn:wmo:md:int-wmo-example:forecast-dataset' ...
Ingest & Publish: "Universal"-plugin
Now that you know how to upload data to MinIO, let's try to upload data for the forecast dataset you created in the previous practical session that is using the "Universal"-plugin.
Go back to the MinIO web interface in your browser, select the bucket wis2box-incoming, and click Create new path.
This time make sure to create a directory that matches the metadata identifier for the forecast dataset you created in the previous practical session:

Enter the newly created directory, click Upload and upload the file you used previously, mydata.nc, into the new directory. Check the Grafana dashboard to see if the data was successfully ingested and published.
You should see the following error in the Grafana dashboard:
ERROR - Path validation error: Unknown file type (nc) for metadata_id=urn:wmo:md:int-wmo-example:forecast-dataset. Did not match any of the following:grib2
Question
Why was the data not ingested and published?
Click to Reveal Answer
The dataset was configured to only process files with the .grib2 extension only. The File Extension configuration is part of data mappings you defined in the previous practical session.
Download this file GEPS_18August2025.grib2 to your local computer and upload it into the directory you created for the forecast dataset. Check the Grafana dashboard and MQTT Explorer to see if the data was successfully ingested and published.
You will see the following ERROR in the Grafana dashboard:
ERROR - Failed to transform file http://minio:9000/wis2box-incoming/urn:wmo:md:int-wmo-example:forecast-dataset/GEPS_18August2025.grib2 : GEPS_18August2025.grib2 did not match ^.*?_(\d{8}).*?\..*$
Question
How can you address this error?
Click to Reveal Answer
The filename does not match the regular expression you defined in the dataset configuration. The filename must match the pattern ^.*?_(\d{8}).*?\..*$, which requires an 8-digit date (YYYYMMDD) in the filename.
Rename the file to GEPS_202508180000.grib2 and upload it again to the same path in MinIO to re-trigger the wis2box workflow. (or download the renamed file from here: GEPS_202508180000.grib2.
After fixing the issue with the filename, check the Grafana dashboard and MQTT Explorer to see if the data was successfully ingested and published.
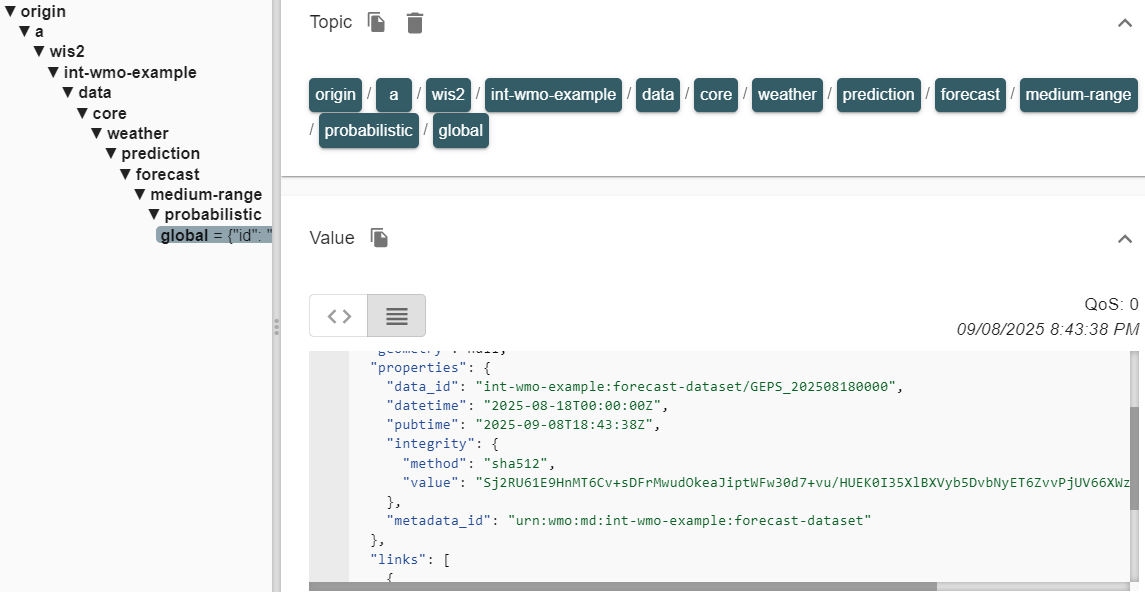
You should see a new WIS2 data notification in MQTT Explorer:
About the Universal Plugin
The "Universal"-plugin allows you to publish data without any transformation. It is a pass-through plugin that ingests the data file and publishes it as-is. In order to add the property "datetime" to the WIS2 data notification, the plugin relies of the first group in the File Pattern to match the date for data you are publishing.
Bonus Question
Try uploading the same file again to the same path in MinIO. Do you get another notification in MQTT Explorer?
Click to Reveal Answer
No. In the Grafana Dashboard you will see an error indicating that the data was already published:
ERROR - Data already published for GEPS_202508180000-grib2; not publishing
This demonstrates that the data workflow was triggered, but the data was not re-published. The wis2box will not publish the same data twice.
If you want to force re-sending the notification for the same data, delete the data from the 'wis2box-public' bucket before re-ingesting the data.
Ingest & Publish: "synop2bufr"-plugin
Next you will dataset you created in the previous practical session using Template='weather/surface-based-observations/synop'. The template pre-configured the following data plugins for you:
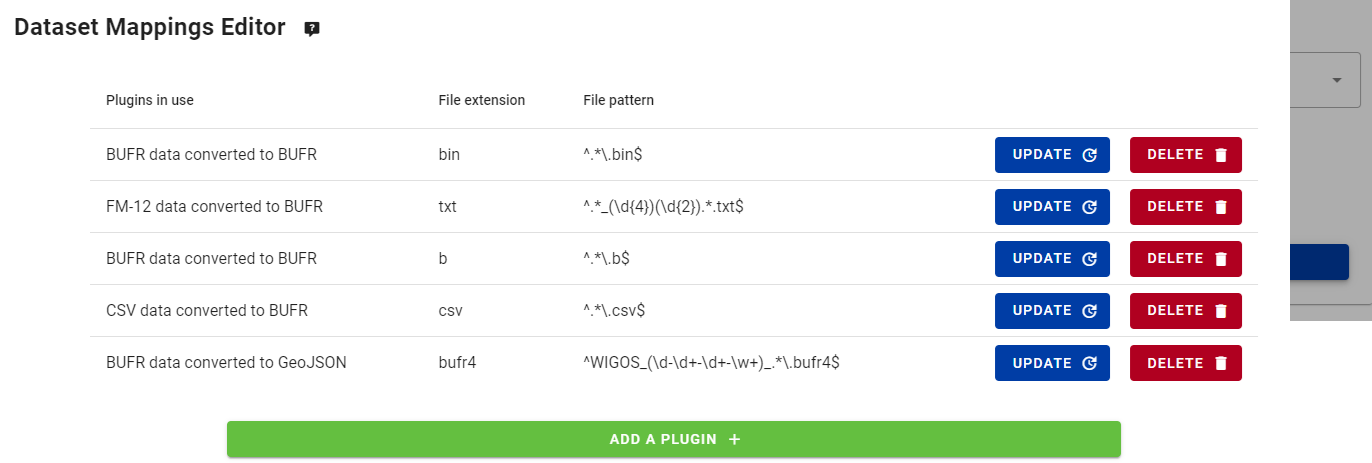
Note that one of the plugins is FM-12 data converted to BUFR (synop2bufr) which is configured to run on files with File extension txt.
Download this sample data synop_202502040900.txt (right-click and select "save as" to download the file) to your local computer. Create a new path in MinIO that matches the metadata identifier for the synop dataset, and upload the sample data into this path.
Check the Grafana dashboard and MQTT Explorer to see if the data was successfully ingested and published.
Question
Why did you not get a notification in MQTT Explorer?
Click to Reveal Answer
In the Grafana Dashboard you will see a warning indicating:
WARNING - Station 64400 not found in station file
Or if you had no stations associated with the topic you will see:
ERROR - No stations found
The data workflow was triggered, but the data plugin could not process the data due to missing station metadata.
About the plugin FM-12 data converted to BUFR
This plugin attempts to transform the FM-12 input data into BUFR format.
As part of the transformation, the plugin adds missing metadata to the output data, such as the WIGOS station identifier, location and barometer height of the station. In order to add this metadata, the plugin looks up this information in the station list of your wis2box instance using the traditional (5-digit) identifier (64400 in this case).
If the station is not found in the station list, the plugin cannot add the missing metadata and will not publish any data.
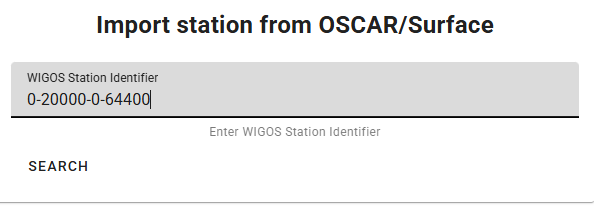
Add the station with WIGOS identifier 0-20000-0-64400 to your wis2box instance using the station editor in the wis2box-webapp, as you you learned in the Configuring Station Metadata practical session.
Retrieve the station from OSCAR:
Add the station to the topic for '../weather/surface-based-observations/synop' and save the changes using your authentication token.
After adding the station, re-trigger the wis2box workflow by uploading the sample data file synop_202502040900.txt again into the same path in MinIO.
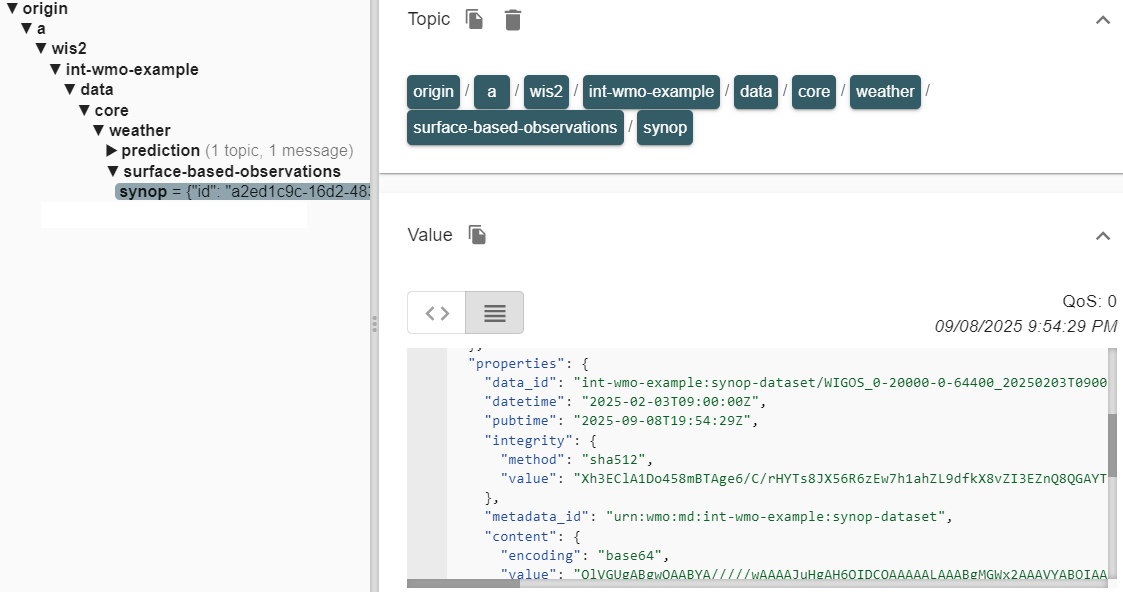
Check the Grafana dashboard and check MQTT Explorer to confirm that the data was published successfully. If you see the notification below then you published the synop sample data successfully:
Question
What is the extension of the file that was published in the WIS2 data notification?
Click to Reveal Answer
Check the Links section of the WIS2 data notification in MQTT Explorer and you will see the canonical link:
{
  "rel": "canonical",
  "type": "application/bufr",
  "href": "http://example.training.wis2dev.io/data/2025-02-04/wis/urn:wmo:md:int-wmo-example:synop-dataset/WIGOS_0-20000-0-64400_20250204T090000.bufr4",
  "length": 387
}
The file extension is .bufr4, indicating that the data was successfully transformed from FM-12 format to BUFR format by the plugin.
Ingesting data using Python
Using the MinIO web interface is a convenient way to manually upload data to MinIO for testing purposes. However, in a production environment you would typically use automated processes to upload data to MinIO, for example using scripts or applications that use the MinIO S3-compatible API.
In this exercise, we will use the MinIO Python client to copy data into MinIO.
MinIO provides a Python client, which can be installed as follows:
pip3 install minio
On your student VM, the 'minio' package for Python will already be installed.
Copy the directory exercise-materials/data-ingest-exercises to the directory you defined as the WIS2BOX_HOST_DATADIR in your wis2box.env file:
cp -r ~/exercise-materials/data-ingest-exercises ~/wis2box-data/
Note
The WIS2BOX_HOST_DATADIR is mounted as /data/wis2box/ inside the wis2box-management container by the docker-compose.yml file included in the wis2box directory.
This allows you to share data between the host and the container.
In the exercise-materials/data-ingest-exercises directory, you will find an example script copy_file_to_incoming.py that can be used to copy files into MinIO.
Try to run the script to copy the sample data file synop_202501030900.txt into the wis2box-incoming bucket in MinIO as follows:
cd ~/wis2box-data/data-ingest-exercises
python3 copy_file_to_incoming.py synop_202501030900.txt
Note
You will get an error as the script is not configured to access the MinIO endpoint on your wis2box yet.
The script needs to know the correct endpoint for accessing MinIO on your wis2box. If wis2box is running on your host, the MinIO endpoint is available at http://YOUR-HOST:9000. The script also needs to be updated with your storage password and the path in the MinIO bucket to store the data.
Update the Script and Ingest the CSV Data
Edit the script copy_file_to_incoming.py to address the errors, using one of the following methods:
- From the command line: use the nano or vim text editor to edit the script.
- Using WinSCP: start a new connection using File Protocol SCP and the same credentials as your SSH client. Navigate into the directory wis2box-data/data-ingest-exercises and edit copy_file_to_incoming.py using the built-in text editor.
Ensure that you:
- Define the correct MinIO endpoint for your host.
- Provide the correct storage password for your MinIO instance.
- Provide the correct path in the MinIO bucket to store the data.
Re-run the script to ingest the sample data file synop_202501030900.txt into MinIO:
python3 ~/wis2box-data/ ~/wis2box-data/synop_202501030900.txt
Ensure the errors are resolved.
Once you manage to run the script successfully, you will see a message indicating that the file was copied to MinIO, and you should see data notifications published by your wis2box instance in MQTT Explorer.
You can also check the Grafana dashboard to see if the data was successfully ingested and published.
Now that the script is working, you can try to copy other files into MinIO using the same script.
Ingesting Binary Data in BUFR Format
Run the following command to copy the binary data file bufr-example.bin into the wis2box-incoming bucket in MinIO:
python3 copy_file_to_incoming.py bufr-example.bin
Check the Grafana dashboard and MQTT Explorer to see if the test data was successfully ingested and published. If you see any errors, try to resolve them.
Verify the Data Ingest
How many messages were published to the MQTT broker for this data sample?
Click to Reveal Answer
You will see errors reported in Grafana as the stations in the BUFR file are not defined in the station list of your wis2box instance.
If all stations used in the BUFR file are defined in your wis2box instance, you should see 10 messages published to the MQTT broker. Each notification corresponds to data for one station for one observation timestamp.
The plugin wis2box.data.bufr4.ObservationDataBUFR splits the BUFR file into individual BUFR messages and publishes one message for each station and observation timestamp.
Ingesting data over SFTP
The MinIO service in wis2box can also be accessed over SFTP. If you have an existing system that can be configured to forward data over SFTP, you can use this as an alternative method to automate your data ingestion.
The SFTP server for MinIO is bound to port 8022 on the host (port 22 is used for SSH).
In this exercise, we will demonstrate how to use WinSCP to upload data to MinIO using SFTP.
You can set up a new WinSCP connection as shown in this screenshot:
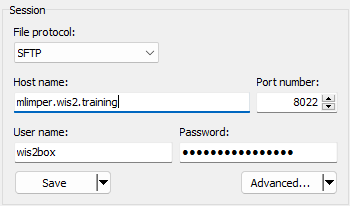
The credentials for the SFTP connection are defined by WIS2BOX_STORAGE_USERNAME and WIS2BOX_STORAGE_PASSWORD in your wis2box.env file and are the same as the credentials you used to connect to the MinIO UI.
When you log in, you will see the buckets used by wis2box in MinIO:
You can navigate to the wis2box-incoming bucket and then to the folder for your dataset. You will see the files you uploaded in the previous exercises:
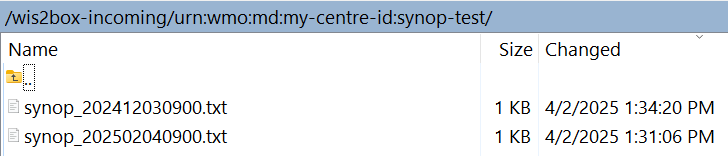
Upload Data Using SFTP
Download this sample file to your local computer:
synop_202503030900.txt (right-click and select "save as" to download the file).
Then upload it to the incoming dataset path in MinIO using your SFTP session in WinSCP.
Check the Grafana dashboard and MQTT Explorer to see if the data was successfully ingested and published.
Click to Reveal Answer
You should see a new WIS2 data notification published for the test station 0-20000-0-64400, indicating that the data was successfully ingested and published.

If you use the wrong path, you will see an error message in the logs.
Conclusion
Congratulations!
In this practical session, you learned how to:
- trigger the wis2box workflow by uploading data to MinIO using various methods.
- debug common errors in the data ingestion process using the Grafana dashboard and the logs of your wis2box instance.
- monitor WIS2 data notifications published by your wis2box in the Grafana dashboard and MQTT Explorer.